Posts

6 Most Common Mistakes Hunters Make While Using a Laser Rangefinder.

INTRO

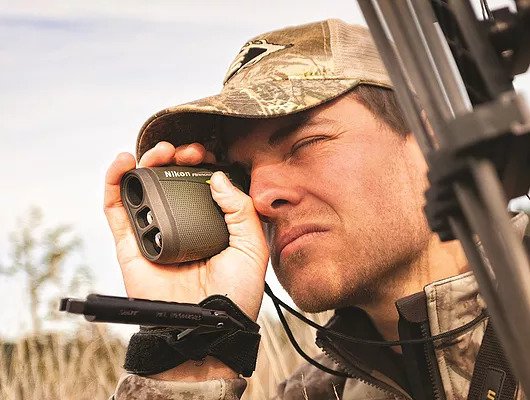
A laser rangefinder is known to be one of the hunter’s best companion, where it significantly increases our chances of making a clean shot. You need a rangefinder especially if you love to hunt on a tree-stand or any form of long-range hunting.
The laser rangefinder would send a laser beam to your intended object, and the object would reflect the beam. It would later determine the time traveled for the light to calculate the distance between you and your target.
Although having a laser rangefinder would be one of your best hunting asset, the efficiency of a laser rangefinder can be affected if you make some fundamental mistakes. Here are 6 common mistakes you must avoid when you are hunting!

Mistake 1: Your target may be out of range

Do not believe the maximum range estimate that is stated for your rangefinder! Usually, the stated estimate concerns the yards that it can measure when the rangefinder is used on highly reflective surface.
The reflective capacity of your target may not be good and this would affect the reading of the rangefinder. The greater the distance, the more the reading would be affected.
Sometimes, the manufacturers for rangefinders would provide estimates on a variety of targets. Hence, do note that the maximum range if it involves a highly reflective surface may be 775 yards, but if you want to target a deer, it may only be 320 yards.
Remember that your laser rangefinder would not be capable of giving accurate results if the intended target is outside of the range. Therefore, knowing the limits of your rangefinder can give you a rough estimation of how accurate your rangefinder can be with different distance and surface. To know this, you can take time to range your surroundings before taking your shot.

Mistake 2: Keeping your rangefinder in a bad condition

It may be frustrating where, at the point of time you are all setup to shoot but because some part of the component in the rangefinder spoiled, your shot became inaccurate.
Although a rangefinder is generally a sturdy piece of equipment, it still needs to be taken care of properly like a vehicle. Your rangefinder should be properly used, and then properly kept. You have to invest some time and money on optic care, such as investing in a proper carrying case. Helpful habits such as avoiding from touching the optical surfaces on your laser rangefinder should be adopted to prevent damaging the anti-reflection coating.
For example, dropping your rangefinder would be enough to make it inaccurate or malfunction. Also, if the battery in the rangefinder is weak, it may affect the accuracy and effectiveness of the rangefinder. Hence, you should keep your rangefinder in a good condition to have an accurate reading.

Mistake 3: You have focused on the wrong target

Often, hunters who use laser rangefinders would zoom into their target. However, after zooming to a certain extent, you may find that the laser beam would be pointing some other place.
The function of magnification of a laser rangefinder allows you to ensure that the reticle is actually focused on your intended target. However, most hunters are not aware of the possibility that the laser beam would point elsewhere after a certain power of magnification.
To reduce the possibility of committing this mistake, you must make sure that the rangefinder you purchased has good-quality glass and appropriate magnification.
Furthermore, places with low light such as when you are outdoors in the night, your rangefinder may not be able to focus on the intended target effectively. Only rangefinders which are made to deal with these situations would reduce the possibility of focusing on a wrong target. One suggestion is that you can bring a bright torchlight along to mitigate this problem.

Mistake 4: Inaccurate reading because of surrounding blockages

Despite using a rangefinder would mean that you would have a great advantage in shooting a target accurately, you must still be aware of your surroundings. After being familiar with your surroundings, you will be capable of realizing that your laser beam is hitting another target, such as a surrounding rocks or tree branch.
This is particularly tricky when you face situations such as raining, where there is a possibility that the beam would hit the rain drops instead of the target. Being in a surrounding that is filled with fog would jeopardize the reading as well. Therefore, remember to be careful whenever you are in a terrain with falling snow or pouring rain.

Mistake 5: Not accounting for the elevation angle of your target

It is important to note that a laser rangefinder give you only the line of sight distance and does not compensate for different angles. When you shoot arrows or shots over a certain height, the gravity would act unevenly on different parts of the arrows or shot, making you to tend to shoot over your target.
Bowhunters who usually shoot from elevated positions would involve high angle shots, which would cause them to shoot over targets. To overcome this problem, you can use simple trigonometry to calculate the compensation in angle required. Alternatively, some of the rangefinders come with angle compensators and your readings would be more accurate than one without.

Mistake 6: Disregarding the “Gut Feel”

You can develop the skill where you can guess the distance accurately by simply looking at an object. Despite having a rangefinder, you should not disregard your most powerful asset, which is your instinct. Although you may not be able to pinpoint your targets accurately from the start, do not feel overwhelmed. Remember to persist in training this ability through trial and error, because the ‘gut feel’ can give you the edge in determining whether your shot would be accurate.

Conclusion

A laser rangefinder is one of the most popular hunting tool which increases your potential in making a clean shot. Do remember to only select functions that you require for your rangefinder. This can help you to cut unnecessary cost, while making sure that it can be most efficient for your individual use!
By overcoming these common mistakes while using a rangefinder, you would be more capable of accurately hitting your target. If there are any suggestions you would like to share, please comment in the box below!
About the Author.
I am John Lewis, a blogger, survivalist and outdoor enthusiast. You can follow me over at Epic Wilderness.

How to Budget Your Optics Purchase for Western Hunts

Make a Budget Strategy for Western Hunting Optics

Hunting the west is the dream of sportsmen and women all across the nation. The west is a place full of promise, full of big game, and full of the potential of trophies. For many hunters, a trip out west is a huge investment, requiring multiple resources. Whether you’re pursuing Elk, Mule Deer, Bighorn Sheep, Antelope, or Moose; putting together a hunt in a western state takes planning and resources. For most of us, one of the limiting factors to hunting the west is budget. Hunting trips in general are not cheap. So many resources come into account: time away from family and work, the cost of tags and travel, and the endless amount of gear and accessories for hunting, not to mention the time it takes to draw a tag and plan the hunt. One of the most critical components of a hunter’s gear are optics. Western hunting optics in particular can make or break a hunt, and investing in quality optics takes strategy.

SHOP DISCOUNT BINOCULARS AND SPOTTING SCOPES

With your rangefinder and riflescope, or bow sight aside; let’s consider investing $1,000.00 in optics for the hunt. What are your options? What and where do you invest? What are the deciding factors for selecting optics for your hunt?

Trying to put your $1,000.00 to work effectively, let’s consider the factors that dictate your investment plan for the right optics. Many elements come into play and should be examined when you’re deciding on how to invest your optic budget: hunting style, terrain, vegetation, and animal behavior. Western hunting is full of scenarios from huge Rocky Mountains full of dark timber and aspens, to massive juniper flats and rolling oak brush. The species you’re in pursuit of, the terrain, and the time of season will dictate your hunting style and how you can best use your optic arsenal. Overall this debate comes down to whether or not you should invest in a quality pair of binoculars or a high-end spotting scope, or balance the budget for mid-quality for both.

Hunting Style

The west is a vast land full of hunting opportunity. With all that land and game many styles of hunting have developed. Each style has its place and is a result of many other factors on your hunt. Being proficient at each of the hunting styles will help make you a better hunter and increase your odds of filling a western big game tag. The key optics on a western hunt aside from a rangefinder and riflescope or bow sight are binoculars and a spotting scope. Both binoculars and spotting scopes are useful tools on most any hunt, but noticeable differences on quality as it relates to price require hunters to consider an investment strategy that matches their hunting style, terrain of the hunt, and budget.

Spot and Stalk Optics

Much of the topography in the west is scattered with mountains, canyons, and vistas allowing for extensive searching and scouting with long range optics. Spending time behind quality optics, glassing distant ridges and bowls in order to plan a stalk on located game is a style of hunting the west is famous for: Spot and stalk hunting works well for late season bull elk, antelope on the plains, bedded mule deer, and high country sheep.

Optic Strategy – A quality spotting scope on a tripod with high power magnification is the key to this type of hunting. A good pair of compact binoculars in a lower power for the stalk is the perfect pairing for spot and stalk hunting. In this scenario, the bulk of your $1,000.00 investment is put to work toward your spotting scope, and the remainder is devoted to binoculars.

Nikon Prostaff 5 20-60X82 Spotter Outfit with a packable tripod and included lens cloth is a perfect choice for spot and stalk hunting. Pair the Nikon Prostaff spotting scope with a compact pair of Nikon Monarch 8X42 binoculars for the stalk and complete the system and come in under budget!

Elk Hunting Optics

Fast and furious action during the elk rut can’t be beat. Hunting bugling bulls with a rifle, bow, or muzzleloader makes for an exciting hunt with plenty of running and gunning. Listening for bugles in elk country and putting on miles to intercept a hot bull is a proven way to close the deal.

Optic Strategy – Hunting rutting bulls in the fall typically involves a run and gun scenario using timber and terrain for cover to move into position. Elk must be kept upwind and out of sight when you make your move. In this scenario quality elk hunting binoculars are your best bet. A lot of hunters leave the spotting scope at home during the rutting season, if you choose to bring one along it can be setup and used to glass dark timber edges during slow afternoons.

Zeiss Conquest HD 10X42 binoculars are premium lightweight and compact optics ideally suited to moving in and out of timber and through meadows hunting rutting elk. These hunting binoculars will tap out your budget, but will be a cornerstone investment for years to come. The 10X power magnification of the binoculars is a good compromise for higher power magnification while keeping mobility and simplicity for run and gun style hunting in mind.

Ambush Hunting

Hunting ambush style can be an effective way to bring home a western trophy if you do your homework and put in some scouting. Using a blind or tree stand, or just waiting in the shadows in an area the animals are using is a proven tactic. Setting up over a watering hole, wallow, or natural feed source and waiting for the game to come to you is a passive style of hunting that helps keep nearby game from spooking and leaving the area. Keep in mind prevailing wind direction, thermal changes, and sunlight throughout the day, and consider that some ambush points may be better than others depending on wind and time of day.

Optic Strategy – Ambush hunting might very well be the oldest form of hunting. With such a long history and tradition comes multiple options and viewpoints on technique. Waiting out antelope at a waterhole on a vast prairie is much different than sitting in a tree stand over an elk wallow surrounded by timber. Terrain is the biggest factor to consider when it comes to optics and ambush hunting. Let’s break down ambushing game into two categories: open terrain and closed terrain.

Open Terrain – Sitting a watering hole for antelope on the prairie, or over an open travel corridor for mule deer often lends itself to an open type terrain where a game animal is predicted to travel to or from a certain area. In this type situation, pairing a spotting scope and binoculars from your hide is a fantastic option. Utilizing a spotter to scan distant terrain and get an up-close view of potential game animals can help you select one or two animals you would like to target from a group. Pairing the spotting scope with binoculars for up close and fast action targets gets you the best of both worlds. This type of hunting calls for a balance between your two optics on both price and quality.

The Diamondback 20-60X80 spotting scope by Vortex brings distant objects up close and allows you to scout open country from your ambush location. Using ½ of your budget, you’ve still got money left over to invest in a quality pair of binoculars. Vortex Viper HD 8X42 binoculars are a foolproof fit to pair with the Diamondback spotter. These 8 power binoculars are easy to use, compact, and right on budget.

Closed Terrain – The west in known for its grand spaces and vast landscape, but the fact is, many times the best hunting is in closed in areas of cover. Ambush hunting little bits of cover or water holes that animals frequent can be absolutely effective. Tucking a pop up style blind next to an elk wallow in a timbered draw, or hanging a tree stand over a stock tank surrounded by cover is a proven technique for almost every game animal in the west. This type of closed in hunting really lends itself to a pair of high quality 8 power binoculars. Knowing that a spotting scope loses its effectiveness in tight quarters, packing the best binoculars your budget allows makes perfect sense.

Leica’s Trinovid HD 8X42 binoculars are the ideal match for hunting closed terrain. Compact with a 42mm objective lens for gathering light these optics come in right on budget and are the quality binoculars that will last a lifetime.

Final Considerations

Quality western hunting optics are tools that will last a lifetime if cared for. Making the most of your budget, and putting your money to work is critical when you’re planning for a hunt. For many hunters, venturing to the west for a big game hunt only happens once or twice in a lifetime. Take the time to examine your hunting strategy to determine the best fit for optics on your hunt. Consider terrain, target animal species, and seasonal animal behavior when you’re planning your hunt and the type of hunting you will be doing. Most importantly, invest in the highest quality optics your budget will allow.

Why is Pre-Ranging Your Turkey Hunting Setup so Important?

Pre-Ranging Your Turkey Hunting Setup

Turkey hunting success often comes down to whether or not you can get a turkey into range. Whether using a shotgun or a bow, knowing the exact range at which you can effectively shoot a bird is vital. While you might be limited to no more than 40 yards, it’s important that you know where that is in the heat of the moment in the field. Pre-ranging your turkey hunting setup is easy enough but it needs to be ranged with confidence that only comes with the other tips mentioned below!

Know Effective Distance

Almost everybody has heard the phrase “know your effective range”. This phrase applies to every weapon you use regardless of the quarry and is no different for turkey hunting. Finding out what your effective range is for turkey hunting is as simple as patterning your shotgun. Your goal should be to place at least 10 pellets in the head and neck region of a gobbler. When patterning, a better goal to shoot for is around 100 pellets in a 10-inch circle.

Mounting a scope on your shotgun will also help you with adjusting your pattern. Having moving reticles allows you to adjust your scope if your pattern is off in any direction. Similar to deer hunting, just move your reticle to the densest portion of your pattern, shoot, and repeat until you’re confident with where your pattern is hitting on the target. This will help maximize the number of bb’s you’re able to place in the head and neck region of a turkey. Turkey hunting scopes are becoming more popular with most companies having some type of product for easy target acquisition and easy aiming for patterned shotguns. Regardless of whether you use a scope or not, patterning your shotgun will give you confidence knowing your effective range before entering the turkey woods which will also increase your efficiency and success.

Setting Up Turkey Decoys

After you know what your effective range is you can immediately improve your turkey hunting setup and it’s as simple as using this information to help you decide how far away from your blind you should set your decoys. It might be tempting to set your decoys out at your maximum effective range, but you should resist that temptation. Instead, set your decoys up even closer than what you’ve established as your maximum effective range. This will help you to still be able to make a lethal shot even if a gobbler hangs up beyond your decoys. So, for example, if your effective range is 30-yards, try setting your decoy up at 20-yards. That way if a gobbler hangs up at 30-yards, you’ll still be able to take an ethical shot and if that gobbler comes strutting into your decoys at 20-yards, then you should have a chip shot.

Remember that sometimes it doesn’t take much for a tom to hang-up just beyond your decoys so be sure to set yourself up for success. This is when having a rangefinder becomes useful. Having a rangefinder is an easy way to decide whether you should take the shot on a tom or whether he’s just out of range. Be sure to also range natural markers such as easily identifiable trees, shrubs, rocks, patches of grass, etc. to help you quickly determine how far the gobbler is once he becomes visible. Having these natural markers ranged before you have a gobbler in sight will also help you reduce the amount of movement needed to range the gobbler itself. Sometimes, even the best hunting plans can get flipped upside down so be sure to do everything you can to increase your chances of success.

Know the Terrain

Knowing terrain features of the property you’re hunting can greatly improve your turkey hunt. A little bit of scouting can go a long way, particularly if you’re hunting out of a field in a ground blind. First of all, establishing where toms tend to strut in the field before setting up will obviously help determine your blind placement and can be easily accomplished using a trail camera or by doing some scouting from a nearby road. But things may become a little more complicated if you decide to get out of your blind to pursue a bird on foot. Most people have experienced a situation where a tom was gobbling and seemingly coming into their calls, only to have the bird go silent and never show up. Knowing where property lines are and whether there are any creeks that run through the property can increase your chances of success. When chasing a tom, make sure to set up in a way so that property lines and creeks aren’t in between you and the tom. That way, there is no chance for those features to be the cause if a tom hangs up. Also, identify potential strutting areas where there is short vegetation that allows for a gobbler to be seen while strutting. Setting up in strutting areas will also increase your chances of intercepting the tom and closing the deal.

Injuring a Bird

It’s your responsibility as a hunter to make a clean and ethical kill and knowing your effective range will help you to do that. Taking shots that are outside of your effective range, or are taken with brush or tall grass in between the turkey and the hunter will often times lead to a miss or even worse, an injured bird. It can be easy to fall into the mindset that you’re sending several bb’s down range and all it takes is one to kill the bird, but don’t fall into that kind of thinking. Letting a tom walk away uninjured is far better than taking a questionable shot and injuring a bird.

Rangefinders for Turkey Hunting

There are many rangefinders to choose from that can work great for turkey hunting. Here are some good options but feel free to look around for several discount rangefinders and deals!

Vortex Impact 850 Rangefinder 

  • Range Reflective: 10-850 yards
  • Range Deer: 10-400 yards
  • Accuracy: + / – 1 yards @ 100 yards
  • Magnification: 6 x
  • Objective Lens Diameter: 20 mm
  • Eye Relief: 15 mm
  • Length: 3.7 inches
  • Width: 2.95 inches
  • Weight: 5.5 ounces

Nikon Aculon Rangefinder 

  • Finish: Dark Green
  • Magnification: 6x
  • Objective Lens Diameter: 20mm
  • Viewfinder Display: M/YDS
  • Measurement Range (yds): 8-550
  • Accuracy: +/- 1m/yd. (shorter than 100m/yds.), +/- 2m/yds. (100m/yds.+)
  • Eye Relief: 18.3
  • Power Source: 1 CR2 Lithium
  • Size (L&W&H): 4.4×2.8×1.4
  • Weight (oz): 5.6

Following these steps by patterning your shotgun and being confident with your effective range along with carrying a rangefinder while hunting will help to decrease the chances of wounding a bird and increase your chances of success.